My neighbor brought these to a summer potluck last year, and I practically cornered her for the recipe. The combination of tangy lemon and sweet raspberries over that buttery crust? I couldn’t stop at one piece. Now I make them whenever I need something impressive but don’t want to spend hours in the kitchen.
These lemon raspberry cream cheese bars hit that sweet spot between elegant and easy. You get a dessert that looks like it came from a bakery, but the actual work? Maybe 20 minutes of hands-on time. The hardest part is waiting for them to chill.
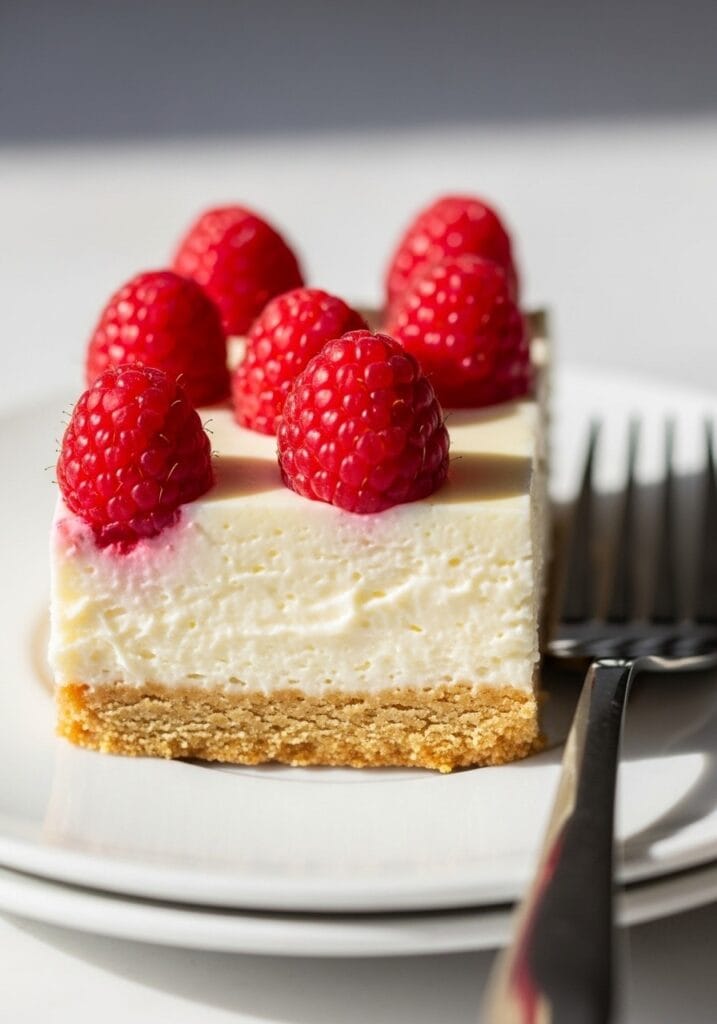
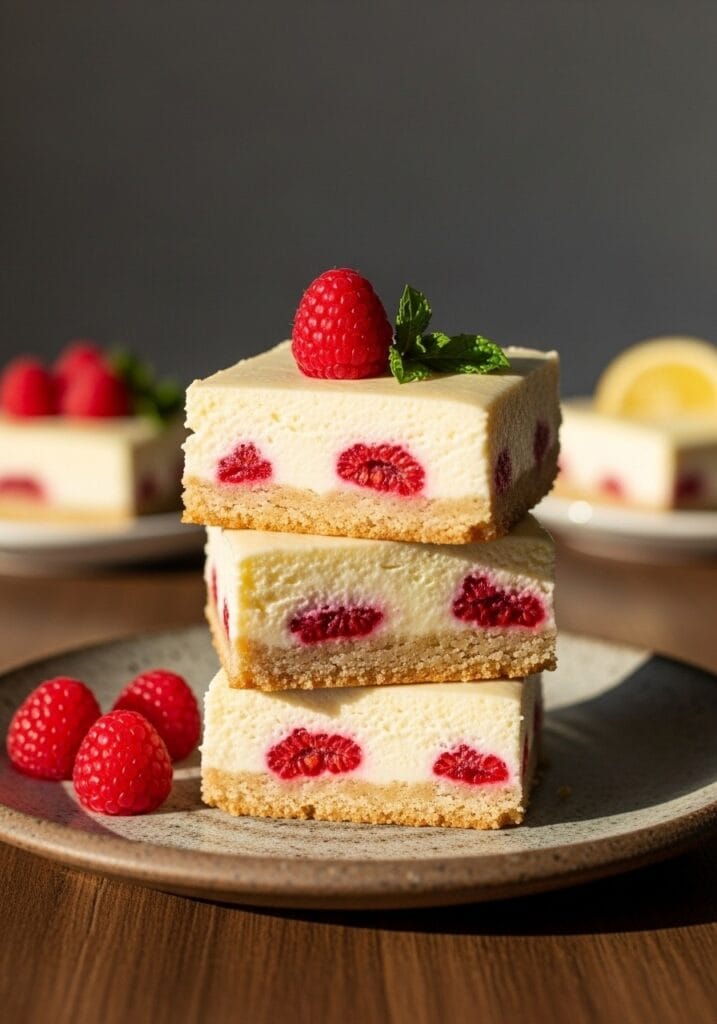
What makes these bars special is the cream cheese layer. It’s tangy from the lemon but still rich and smooth. The raspberries add little bursts of sweetness and that pop of color. They’re sweet enough to satisfy dessert cravings but not so heavy that you feel guilty grabbing a second piece.
Tired of Deciding What to Cook Every Night?
I’ve put together a simple 7-day dinner meal plan using my most-loved recipes — complete with a grocery list and flexible swaps.
Just $2.99 – Instant Download
Get the Meal PlanPerfect for spring gatherings, summer picnics, or when you want something lighter than brownies but more interesting than plain fruit. These bars are beginner-friendly and don’t require any fancy equipment.
Why You’ll Love This Recipe
Time-saving? Absolutely. Active prep time is about 20 minutes. The rest is just baking and chilling. Skill level is easy – if you can mix ingredients in a bowl, you can make these.
The taste profile is bright and refreshing. You get that tangy lemon flavor balanced with sweet cream cheese and juicy raspberries. The graham cracker crust adds a buttery crunch that ties everything together.
They’re also great for meal prep. Make them a day ahead and keep them chilled. They actually taste better after sitting overnight because the flavors have time to blend.
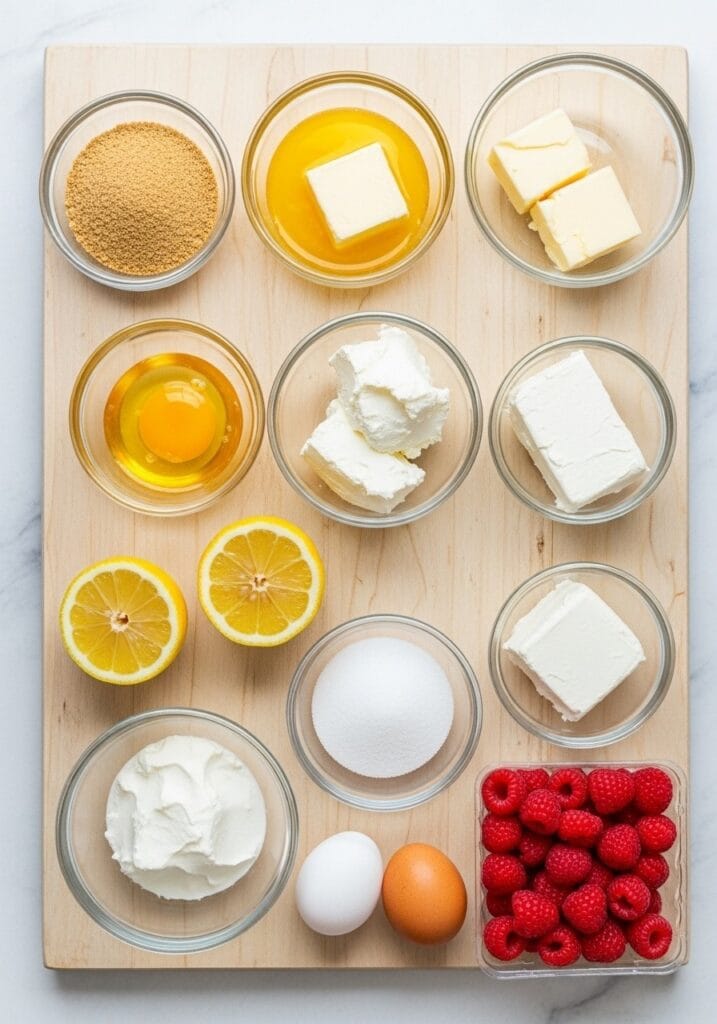
Ingredients
For the Crust
- 1½ cups graham cracker crumbs (about 10-12 crackers, 150g)
- ¼ cup granulated sugar (50g)
- 6 tablespoons unsalted butter, melted (85g)
- Pinch of salt
For the Cream Cheese Filling
- 16 oz cream cheese, softened to room temperature (450g)
- ½ cup granulated sugar (100g)
- 2 large eggs, room temperature
- ⅓ cup fresh lemon juice (about 2 lemons, 80ml)
- 1 tablespoon lemon zest (from about 1 lemon)
- 1 teaspoon vanilla extract
- 2 tablespoons all-purpose flour (15g)
For the Topping
- 1 cup fresh raspberries (125g)
- Optional: powdered sugar for dusting
Substitution Notes: Can’t find fresh raspberries? Frozen work too – just don’t thaw them before adding. If you’re out of graham crackers, vanilla wafer cookies make a good substitute. Greek yogurt can replace half the cream cheese for a tangier, lighter version.
Equipment You’ll Need
- 9×9 inch baking pan (23cm square)
- Parchment paper
- Mixing bowls (2 medium)
- Electric mixer or hand whisk
- Measuring cups and spoons
- Zester or fine grater
- Spatula
Instructions
Step 1: Prepare the Pan
Line your 9×9 inch baking pan with parchment paper, leaving some overhang on two sides. This makes lifting the bars out super easy later. Preheat your oven to 350°F (175°C).
Step 2: Make the Crust
Combine graham cracker crumbs, ¼ cup sugar, melted butter, and salt in a medium bowl. Mix with a fork until the texture looks like wet sand. Every crumb should be coated with butter.
Step 3: Press the Crust
Dump the crumb mixture into your prepared pan. Press it down firmly and evenly using the bottom of a measuring cup or your hands. Make sure to get into the corners. The crust should be compact and level.
Step 4: Bake the Crust
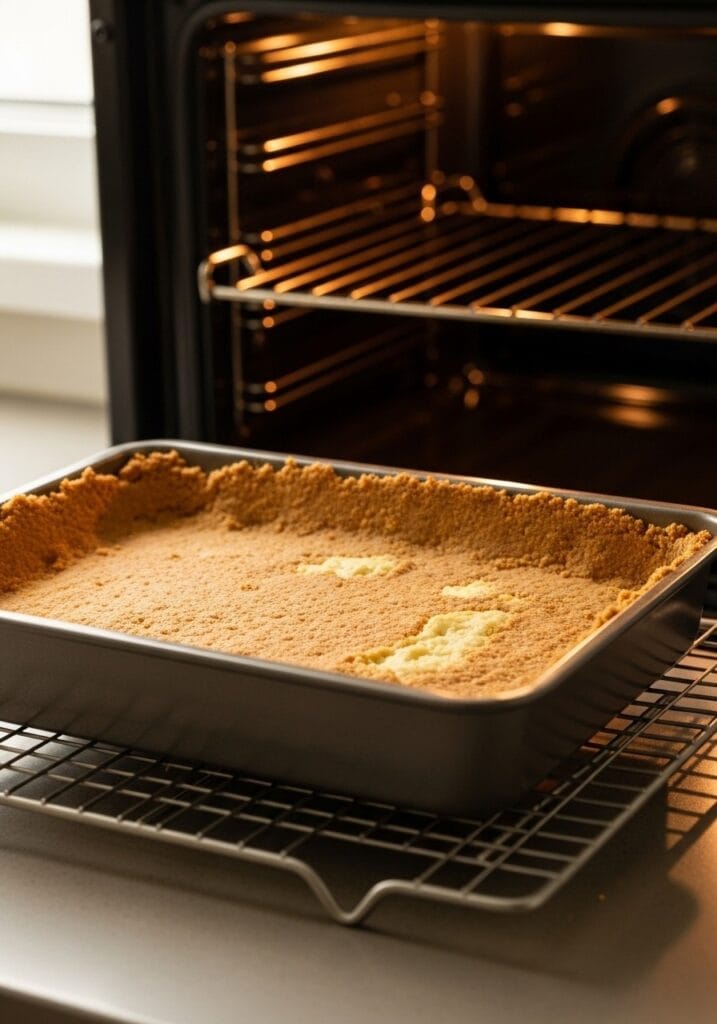
Bake for 8-10 minutes until the crust is lightly golden and smells toasty. Remove from oven and let it cool while you make the filling. Keep the oven on.
Step 5: Beat the Cream Cheese
In a clean bowl, beat the softened cream cheese with an electric mixer on medium speed for 1-2 minutes until smooth and fluffy. No lumps should remain. Scrape down the sides of the bowl.
Step 6: Add Sugar and Eggs
Add ½ cup sugar to the cream cheese and beat for another minute. Add eggs one at a time, mixing just until each is incorporated. Don’t overmix – you don’t want too much air.
Step 7: Add Lemon and Flour
Pour in the lemon juice, add lemon zest, vanilla extract, and flour. Mix on low speed just until everything is combined and smooth. The mixture should be pale yellow and pourable.
Step 8: Pour Over Crust
Pour the cream cheese mixture over the cooled crust. Use a spatula to spread it evenly to all corners. Tap the pan gently on the counter a few times to release any air bubbles.
Step 9: Add Raspberries
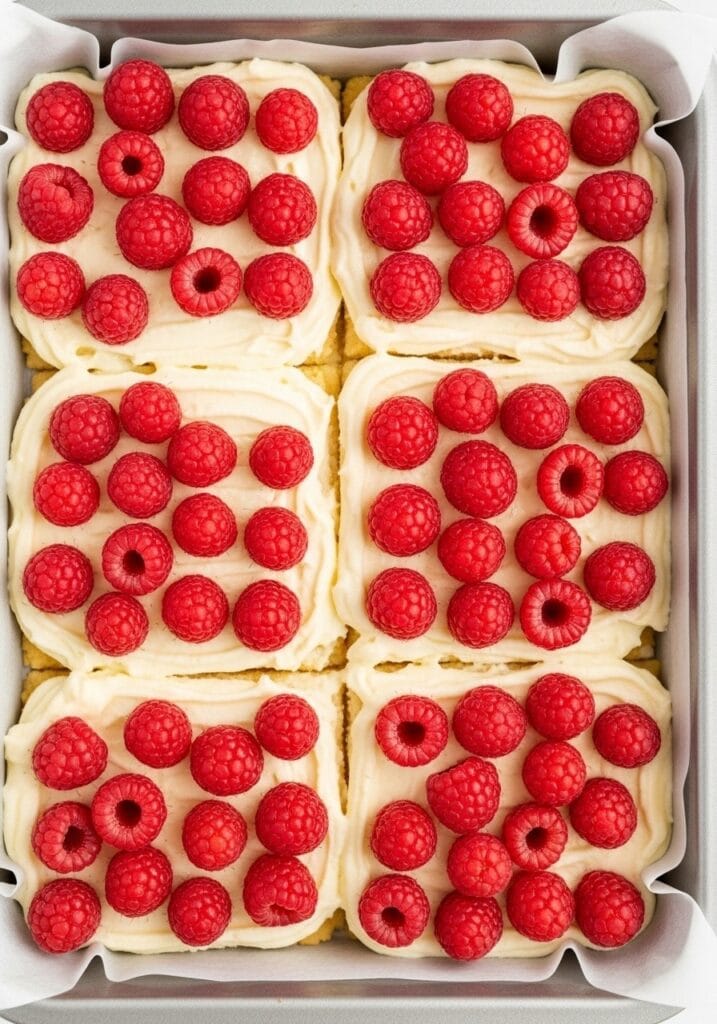
Scatter fresh raspberries evenly over the top of the cream cheese layer. Press them down very gently – just enough so they sit slightly into the filling but don’t sink completely.
Step 10: Bake
Bake for 28-32 minutes. The center should look mostly set with just a slight jiggle when you gently shake the pan. The edges will be lightly golden. Don’t overbake or the filling will crack.
Step 11: Cool Completely
Remove from oven and let the pan cool on a wire rack for 30 minutes at room temperature. Then transfer to the refrigerator and chill for at least 3 hours, preferably overnight.
Step 12: Cut and Serve
Once fully chilled, use the parchment paper overhang to lift the bars out of the pan. Place on a cutting board. Use a sharp knife, wiping it clean between cuts, to slice into 16 squares. Dust with powdered sugar if desired.
Recipe Details
Servings: 16 bars Prep Time: 20 minutes Baking Time: 38-42 minutes Chilling Time: 3 hours Total Time: 4 hours Difficulty Level: Easy
Tips for Perfect Cream Cheese Bars
Room temperature ingredients matter here. Cold cream cheese won’t mix smoothly and cold eggs can create lumps. Leave them out for about 30 minutes before starting.
Don’t skip lining the pan with parchment paper. Trying to cut these bars while still in the pan is frustrating. The parchment lets you lift the whole thing out cleanly.
For clean cuts, chill the bars completely. Use a long, sharp knife and wipe it with a damp cloth between each cut. This prevents the cream cheese from dragging.
The bars will firm up significantly in the fridge. They should feel solid to touch, not soft or jiggly. This usually takes at least 3 hours, but overnight is better.
If you want extra lemon flavor, add another tablespoon of lemon zest to the filling. Some people also brush the crust with a thin layer of melted white chocolate before adding the filling – it creates a moisture barrier and adds sweetness.
Storage and Make-Ahead
Store these bars in an airtight container in the refrigerator. They’ll keep well for up to 5 days. Actually, they taste even better on day two once the flavors have melded.
Can you freeze them? Yes. Wrap individual bars in plastic wrap, then place in a freezer bag. They’ll keep for up to 2 months. Thaw in the refrigerator overnight before serving.
Make-ahead tip: Prepare these the night before your event. They need that chilling time anyway, so it actually works in your favor. Just add the powdered sugar dusting right before serving so it doesn’t get absorbed.
Variations to Try
Want to switch things up? Swap raspberries for blueberries or blackberries. The flavor profile changes slightly but they’re all delicious with lemon.
You could also make a strawberry lemon version using diced strawberries. Or go tropical with passion fruit instead of lemon – just use ⅓ cup passion fruit pulp in place of the lemon juice.
For a no-bake version, you could skip baking the cream cheese layer entirely and use gelatin to set it. But honestly? The baked version has better texture.
If you’re watching sugar, you can reduce the sugar in the filling to ⅓ cup. The lemon and raspberries provide natural sweetness anyway.
Serving Suggestions
These bars are perfect on their own, but a dollop of whipped cream never hurt anyone. Fresh mint leaves make a nice garnish and add a pop of color.
They pair beautifully with coffee or iced tea. I’ve also served them alongside other desserts at parties – they’re lighter than chocolate-heavy options so they balance out the dessert table nicely.
For a fancier presentation, serve each bar with a small pool of raspberry coulis and a twist of lemon peel. Takes 30 seconds and looks restaurant-quality.
Why This Recipe Works
The graham cracker crust provides structure and a subtle sweetness that doesn’t compete with the filling. The butter helps it hold together while staying tender.
Cream cheese creates that rich, tangy base that’s characteristic of classic cream cheese bars. The eggs help set the filling during baking, giving you that perfect sliceable texture.
Fresh lemon juice and zest bring brightness. Lemon and cream cheese are natural partners – the acidity cuts through the richness. Raspberries add sweetness and their seeds provide little textural surprises.
The flour in the filling might seem odd, but it helps stabilize everything. Just 2 tablespoons prevents the bars from being too soft or weeping liquid.
Chilling is crucial. It allows the cream cheese layer to firm up completely. Without adequate chilling, you’ll end up with a messy situation when you try to cut them.
Common Questions
Can I use bottled lemon juice? Fresh is better. Bottled juice has a slightly different flavor and can taste artificial. Plus, you need the zest anyway, so you might as well juice fresh lemons.
Why did my bars crack? Overbaking is usually the culprit. The center should still have a slight jiggle when you remove them from the oven. Also, rapid temperature changes can cause cracking – let them cool gradually.
Can I double this recipe? Absolutely. Use a 9×13 inch pan and keep the baking time similar. Just check for doneness around the 30-minute mark.
Do I have to use fresh raspberries? No, frozen work fine. Just don’t thaw them first – add them frozen directly to the top of the filling. They’ll thaw during baking.
Final Thoughts
These lemon raspberry cream cheese bars have become my go-to when I need something special without the stress. They’re beautiful, they taste amazing, and they’re actually pretty simple to make.
The combination of flavors just works. Tangy lemon, sweet raspberries, rich cream cheese, buttery crust. Every bite has all these elements and they somehow make sense together.
I love that they’re portable too. Unlike pies or layer cakes, you can just grab a bar and go. Perfect for picnics, potlucks, or packing in lunchboxes.
If you’re looking for something different from your usual chocolate desserts, give these a try. They’re refreshing, not too heavy, and they always get compliments. Plus, they photograph beautifully if you’re into that sort of thing.
Make them once and I bet they’ll end up in your regular rotation too. They did for me. Now every time someone asks me to bring dessert, these bars are the first thing I think of.
Still wondering what to cook tomorrow? Take the stress out of dinner with my simple 7-day meal plan.
Get the 7-Day Meal Plan for $2.99