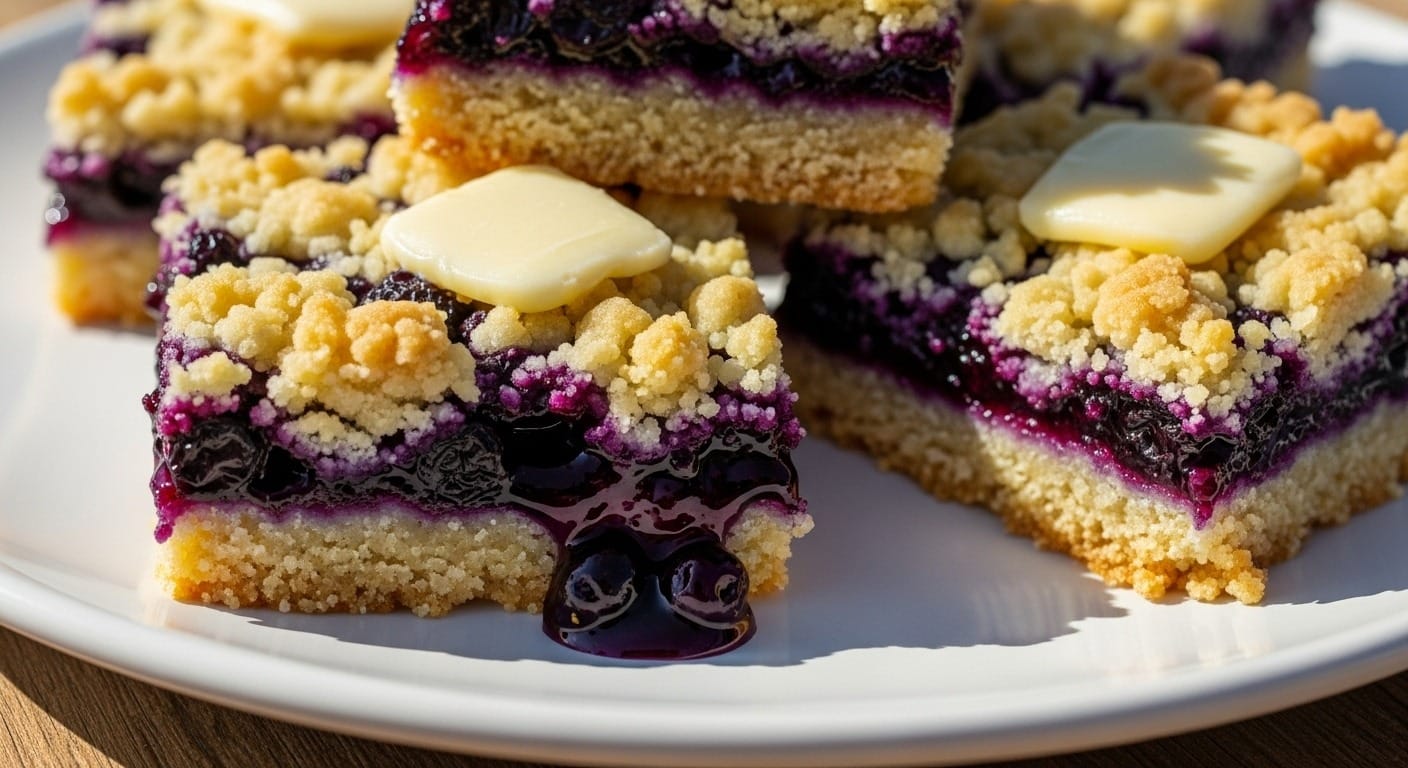
My grandmother used to say that the smell of blueberries baking is like summer bottled up in your oven. She wasn’t wrong. These blueberry crumble bars bring that same warmth to your kitchen, no matter what time of year it is.
What makes this recipe special? It’s the kind of dessert that looks impressive but doesn’t require fancy skills. The buttery crust doubles as the crumble topping, which means less work and more time enjoying the final result. You’ll get perfectly sweet and slightly tart blueberry filling sandwiched between layers of golden, crumbly goodness. Total time from start to finish? About 50 minutes. Skill level? Complete beginner-friendly.
These bars are great for potlucks, afternoon tea, or when you just need something sweet without spending hours in the kitchen. They’re sturdy enough to pack for picnics but tender enough to melt in your mouth. If you love fruit desserts but want something easier than pie, this is your answer.
Tired of Deciding What to Cook Every Night?
I’ve put together a simple 7-day dinner meal plan using my most-loved recipes — complete with a grocery list and flexible swaps.
Just $2.99 – Instant Download
Get the Meal PlanWhy You’ll Love This Blueberry Crumble Recipe
There’s a reason blueberry crumble bars have become a staple in my kitchen. They’re foolproof. Even if you accidentally overbake them slightly, they still taste delicious. The base stays buttery and crisp while the filling stays jammy and sweet.
Unlike a traditional blueberry crumble pie that requires rolling dough and crimping edges, these bars keep things simple. You press the dough into a pan, add the filling, sprinkle more crumbs on top, and bake. No pie weights, no blind baking, no stress.
Another thing? They slice beautifully. You get clean edges and perfect portions every time. That makes them ideal for serving at gatherings or gifting to neighbors. Plus, they’re just as good cold from the fridge as they are slightly warm.
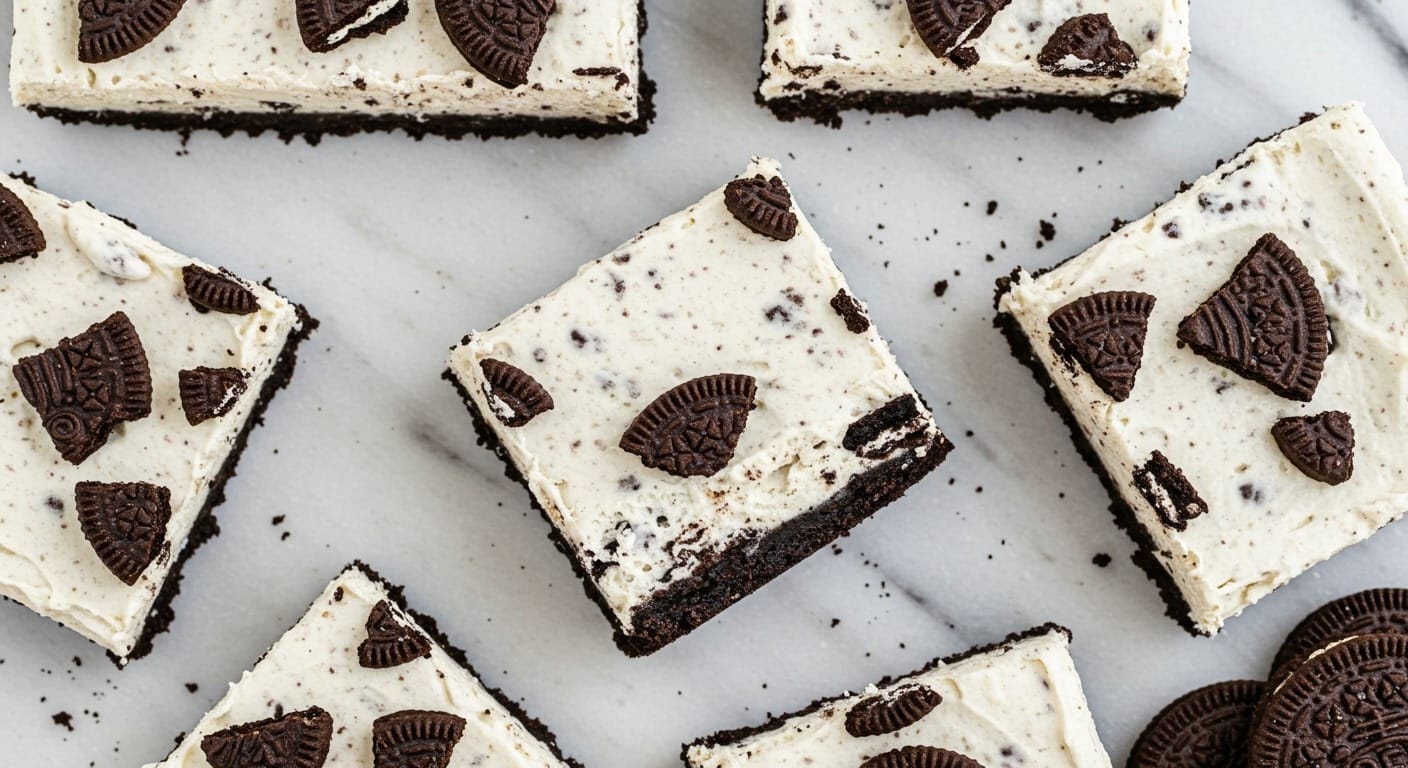
If you’re a fan of quick desserts, you might also enjoy no-bake Oreo cheesecake bars or caramel apple crumble skillet for more easy sweet treats.
Ingredients You’ll Need
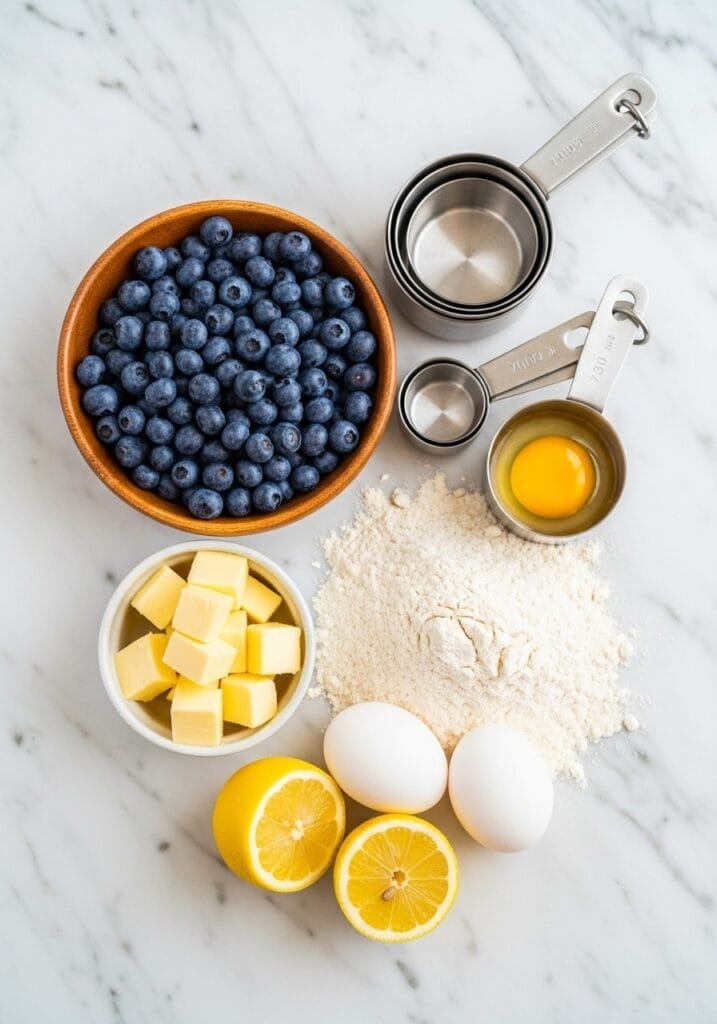
Getting the measurements right makes all the difference in baking. Here’s what you need for this simple blueberry crumble.
For the Crust and Crumble Topping:
- 240g (2 cups) all-purpose flour
- 150g (¾ cup) granulated sugar
- ½ tsp baking powder
- ¼ tsp salt
- 226g (1 cup) unsalted butter, cold and cubed
- 1 large egg
- 1 tsp vanilla extract
For the Blueberry Filling:
- 500g (about 4 cups) fresh or frozen blueberries
- 100g (½ cup) granulated sugar
- 2 tbsp cornstarch
- 1 tbsp lemon juice
- ½ tsp lemon zest (optional, but adds brightness)
Substitutes: If you don’t have cornstarch, use 3 tbsp of all-purpose flour instead. Frozen blueberries work just as well as fresh – no need to thaw them first. If you prefer less sweetness, reduce the sugar in the filling to ⅓ cup.
Equipment You’ll Need
This recipe doesn’t require any special tools. Here’s what you’ll use:
- 9×9 inch (23×23 cm) square baking pan
- Parchment paper (makes cleanup easier)
- Large mixing bowl
- Medium saucepan
- Pastry cutter or fork (for mixing the dough)
- Wooden spoon or spatula
If you don’t have a pastry cutter, two forks work perfectly fine. The goal is to break the butter into small pieces and mix it with the flour until it looks like coarse crumbs.
Step-by-Step Instructions
Let’s get baking. Each step is simple and builds on the last one.
Step 1: Preheat and Prepare the Pan
Preheat your oven to 375°F (190°C). Line your 9×9 inch baking pan with parchment paper, leaving some overhang on the sides. This makes it easier to lift the bars out later. Lightly grease the parchment with butter or cooking spray.
Step 2: Make the Crust and Crumble Mixture
In a large bowl, whisk together the flour, sugar, baking powder, and salt. Add the cold cubed butter. Use a pastry cutter or fork to work the butter into the flour mixture. Keep mixing until it looks like coarse sand with some pea-sized butter chunks remaining. This should take about 3-4 minutes.
Add the egg and vanilla extract. Mix gently until the dough starts to come together. It will look crumbly, not smooth – that’s exactly what you want.
Step 3: Press the Base Layer
Take about two-thirds of the dough mixture and press it firmly into the bottom of your prepared pan. Use your fingers or the bottom of a measuring cup to pack it down evenly. Make sure there are no gaps or thin spots. Set the remaining dough aside for the topping.
Step 4: Make the Blueberry Filling
In a medium saucepan, combine the blueberries, sugar, cornstarch, lemon juice, and lemon zest. Cook over medium heat, stirring frequently. The mixture will start to bubble and thicken after about 5-7 minutes. You’ll see the blueberries release their juices and the filling turn glossy. Remove from heat once it coats the back of a spoon.
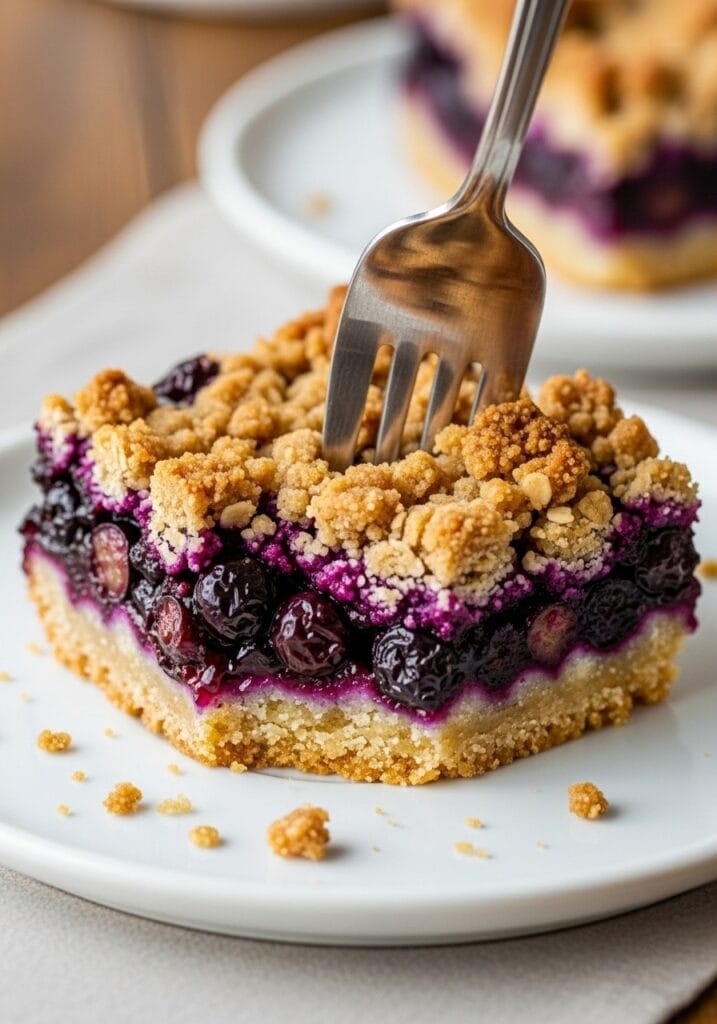
Visual cue: The filling should look jammy and thick, not runny.
Step 5: Assemble the Bars
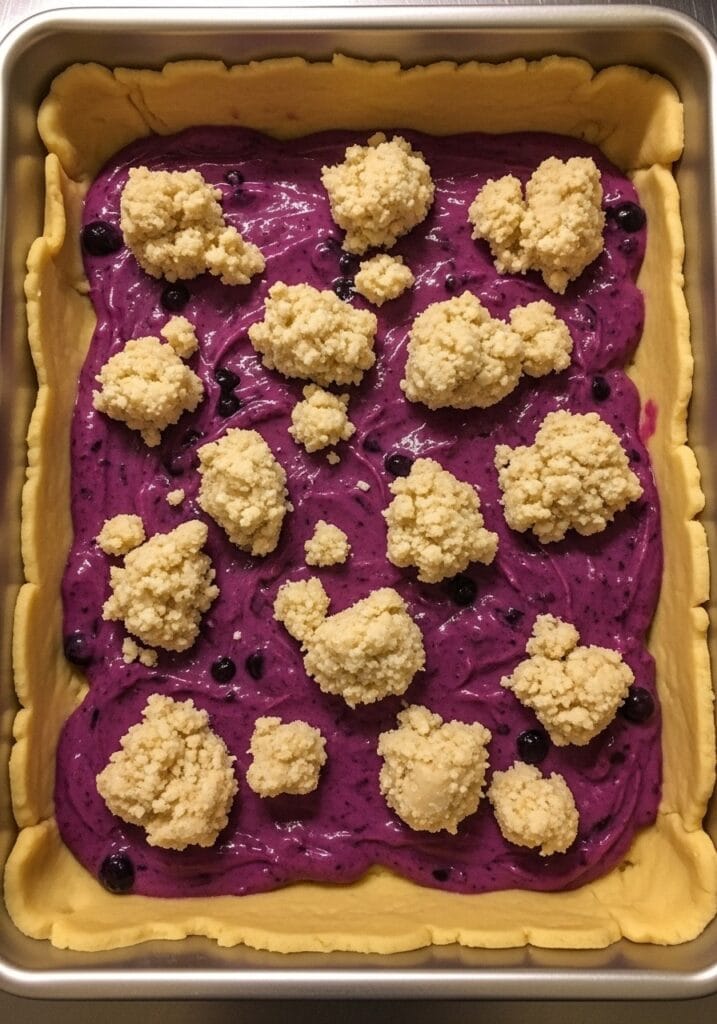
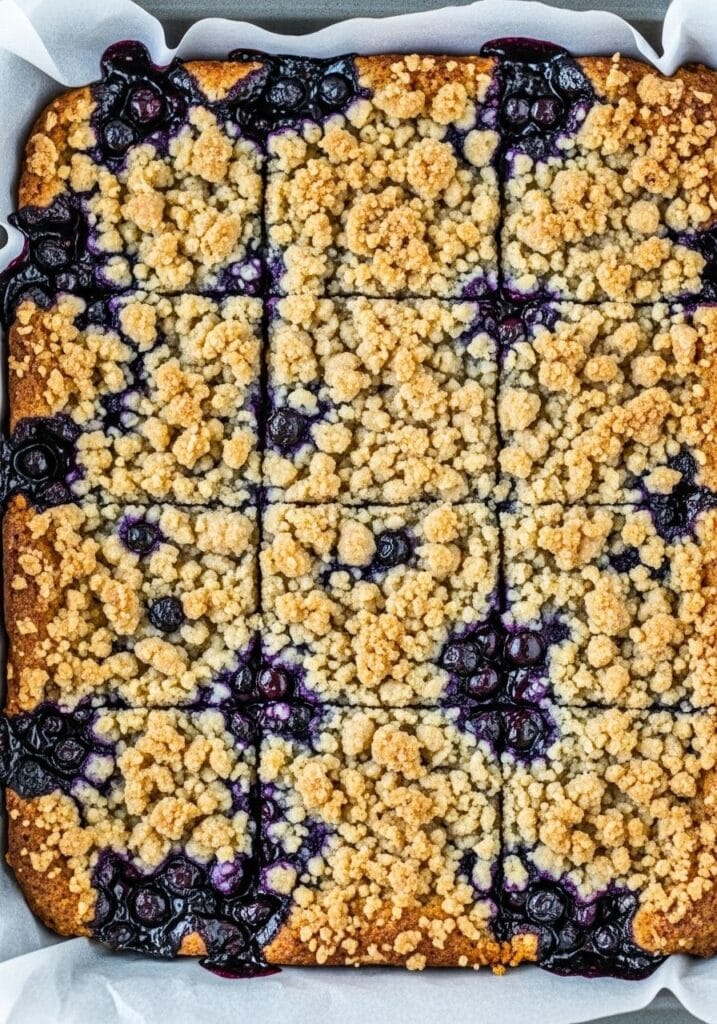
Pour the blueberry filling over the pressed crust, spreading it evenly with a spatula. Take the reserved crumble mixture and break it into small clumps with your fingers. Scatter these clumps evenly over the blueberry layer. Don’t worry about covering every inch – gaps are fine and will give you that rustic crumble look.
Step 6: Bake Until Golden
Place the pan in the preheated oven and bake for 35-40 minutes. The top should turn golden brown and the filling should be bubbling around the edges. If the top browns too quickly, loosely cover with aluminum foil for the last 10 minutes.
Timing tip: Start checking at 35 minutes. Every oven is different.
Step 7: Cool Completely
Remove the pan from the oven and let it cool on a wire rack for at least 1 hour. This step is important – the filling needs time to set properly. If you cut too early, the bars will fall apart. For cleaner slices, refrigerate for another 30 minutes after cooling to room temperature.
Step 8: Slice and Serve
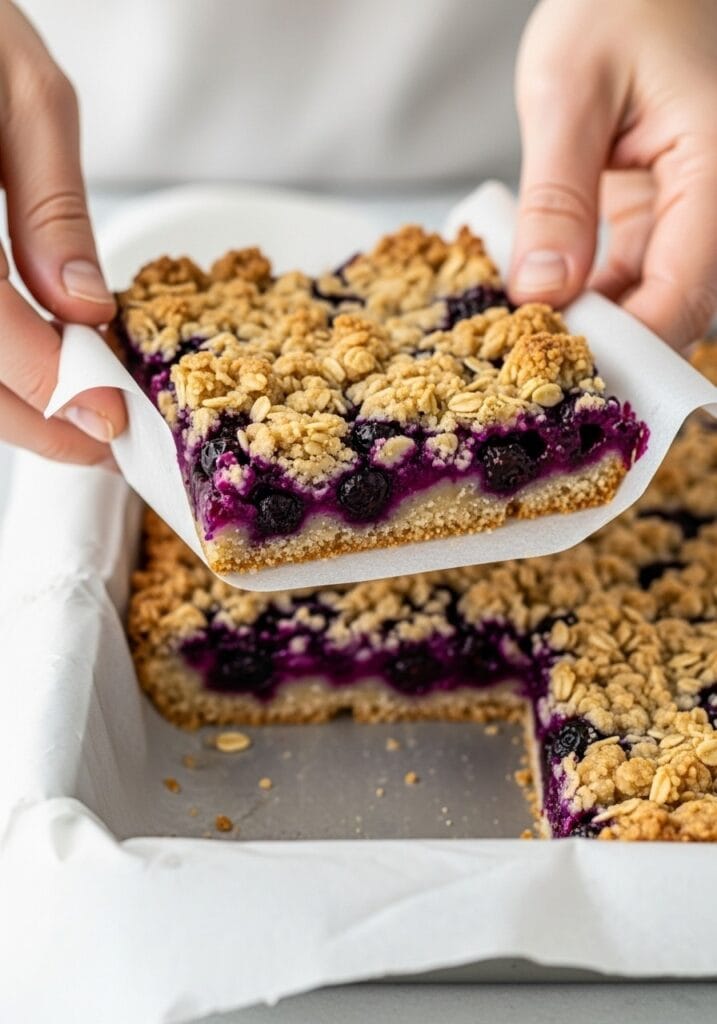
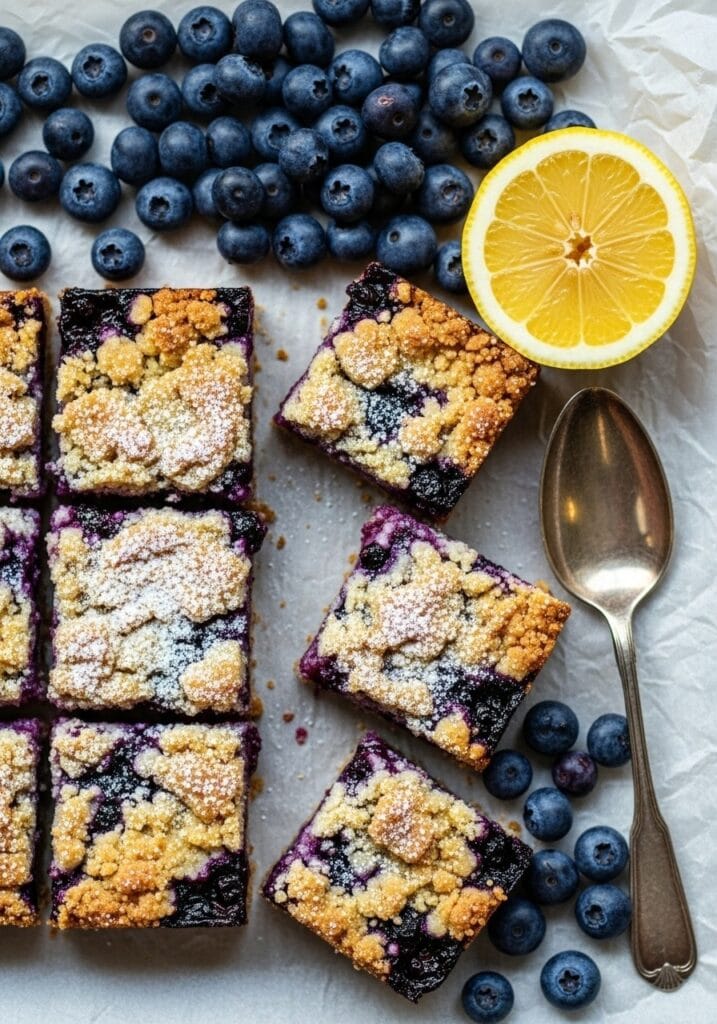
Use the parchment overhang to lift the entire block out of the pan. Place it on a cutting board. Use a sharp knife to cut into 9 or 16 squares, depending on how large you want your portions. Wipe the knife clean between cuts for neat edges.
Recipe Details
Serving Size: 9 large bars or 16 smaller bars Prep Time: 15 minutes Cook Time: 35-40 minutes Cooling Time: 1 hour Total Time: About 1 hour 50 minutes Difficulty Level: Easy (beginner-friendly)
Tips for Perfect Blueberry Crumble Bars
Getting these bars just right is easy if you follow a few simple guidelines.
Use cold butter. This is the secret to a flaky, crumbly texture. If your butter is too soft, the dough will become greasy instead of crumbly. Cut it into cubes and keep it in the fridge until you’re ready to use it.
Don’t skip the cornstarch. It thickens the blueberry filling and prevents it from being too runny. Without it, your bars might turn soggy.
Press the crust firmly. A well-packed base holds up better and doesn’t crumble when you slice it. Use the bottom of a glass or measuring cup to really press it down.
Let them cool completely. I know it’s tempting to dig in right away, but patience pays off. The filling firms up as it cools, making the bars much easier to cut and handle.
If you’re looking for more simple desserts that don’t require advanced techniques, try 3-ingredient peanut butter cookies or chocolate lava mug cake for quick treats.
Variations to Try
Once you’ve mastered the basic recipe, there are plenty of ways to switch things up.
Mixed berry version: Replace half the blueberries with raspberries or blackberries. The tartness balances the sweetness beautifully.
Lemon blueberry crumble: Add 1 tablespoon of lemon zest to the crust mixture and increase the lemon juice in the filling to 2 tablespoons. The citrus makes the flavor pop.
Almond crumble topping: Add ½ cup of sliced almonds to the crumble mixture before sprinkling it on top. It adds a nice crunch and nutty flavor.
Oat crumble: Substitute ½ cup of the flour in the crust with old-fashioned oats. This gives the bars a heartier texture.
Gluten-free option: Use a 1:1 gluten-free baking flour blend instead of all-purpose flour. The texture will be slightly different but still delicious.
Storage and Make-Ahead Tips
These blueberry crumble bars keep well, which makes them great for meal prep or advance baking.
Room temperature: Store in an airtight container for up to 2 days. They’ll stay fresh and maintain their texture.
Refrigerator: Keep them in a sealed container for up to 5 days. The filling firms up even more when cold, which some people prefer.
Freezer: Wrap individual bars tightly in plastic wrap, then place them in a freezer-safe bag or container. They’ll last up to 3 months. Thaw at room temperature for about 30 minutes before eating, or warm them in the microwave for 15-20 seconds.
Make-ahead tip: You can prepare the crust mixture and blueberry filling separately up to 1 day ahead. Store the crust mixture in the fridge and the filling in an airtight container. Assemble and bake when ready.
Serving Suggestions
While these bars are delicious on their own, a few additions can take them to the next level.
Vanilla ice cream: Serve a warm bar with a scoop of vanilla ice cream on top. The contrast between warm and cold is perfect.
Whipped cream: A dollop of freshly whipped cream adds lightness and balances the richness of the buttery crust.
Greek yogurt: For a lighter option, serve with a spoonful of Greek yogurt. It adds tanginess and makes the bars feel less indulgent (even though they absolutely are).
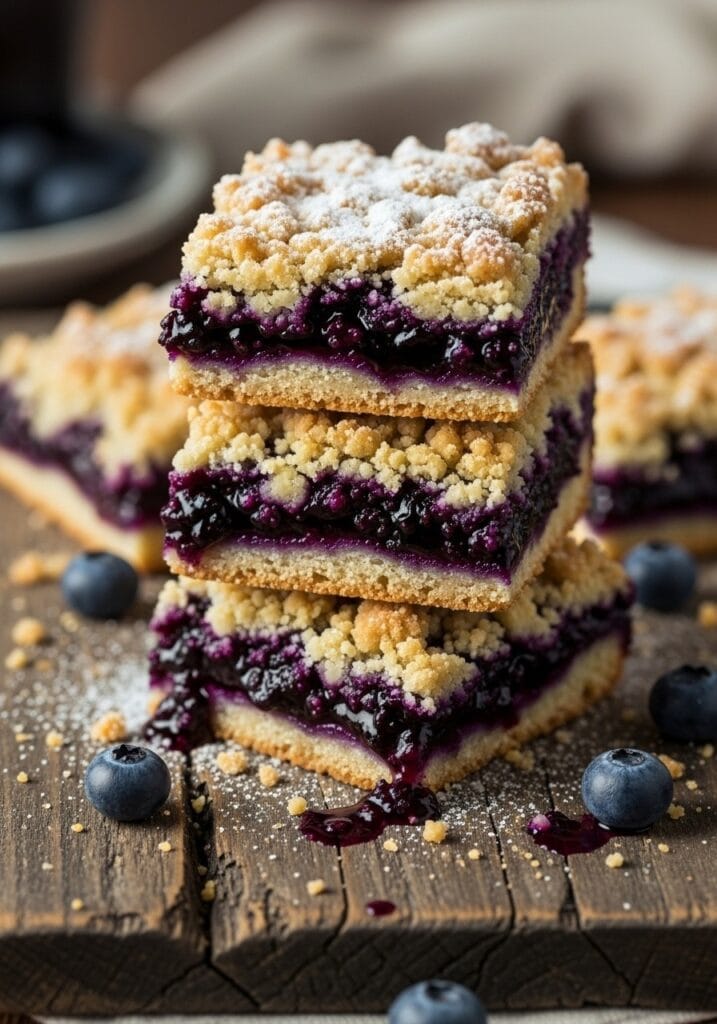
Powdered sugar dusting: A light sprinkle of powdered sugar over the top makes them look bakery-perfect for special occasions.
Pair these bars with peppermint hot chocolate or gingerbread latte for a cozy afternoon treat.
Troubleshooting Common Issues
Even simple recipes can have hiccups. Here’s how to fix the most common problems.
Soggy crust: This usually happens when the filling is too runny. Make sure you cook the blueberry mixture long enough to thicken properly. Adding an extra tablespoon of cornstarch can help if your blueberries are especially juicy.
Crumble topping too hard: If your topping comes out rock-hard instead of crumbly, the dough might have been overworked or the butter wasn’t cold enough. Next time, handle the dough less and keep everything chilled.
Bars falling apart: This happens when they’re cut too soon. Let them cool completely, or even refrigerate them before slicing. Also, make sure you pressed the base layer firmly enough.
Filling leaking out: If the filling bubbles over the sides during baking, you might have added too much. Stick to the measurements and leave a small border around the edges when spreading the filling.
Why This Recipe Works

The magic of these blueberry crumble bars is in the balance. The buttery crust provides a sturdy base that’s rich and slightly sweet. The blueberry filling is tart enough to cut through the richness without being sour. The crumble topping adds texture and a slight crunch that contrasts beautifully with the soft filling.
Using the same dough for both the base and the topping simplifies the process without sacrificing flavor. It’s efficient and ensures that every bite has that buttery, crumbly goodness you’re looking for.
The cornstarch in the filling is key. It absorbs the excess moisture from the blueberries and creates a thick, jammy texture that holds its shape when you slice the bars. Without it, you’d end up with a soggy mess.
If you enjoy simple blueberry crumble desserts, you might also like trying strawberry shortcake mousse jars or no-bake strawberry cheesecake cups for more fruity treats.
Frequently Asked Questions
Can I use frozen blueberries? Yes, frozen blueberries work perfectly. Don’t thaw them before adding to the saucepan. They might release a bit more liquid, so be prepared to cook the filling an extra minute or two to thicken it properly.
How do I know when the bars are done? The top should be golden brown and the filling should be bubbling at the edges. If you insert a toothpick into the crumble topping, it should come out clean or with just a few moist crumbs.
Can I make these bars in a different pan size? Yes, but you’ll need to adjust the baking time. A 9×13 inch pan will give you thinner bars and might bake a bit faster (around 30-35 minutes). An 8×8 inch pan will make thicker bars that need a few extra minutes.
Do I need to add lemon zest? No, it’s optional. The lemon juice provides enough brightness, but the zest adds an extra layer of flavor if you have it on hand.
Can I double the recipe? Absolutely. Use a 9×13 inch pan and follow the same instructions. The baking time might increase by 5-10 minutes.
Final Thoughts
These blueberry crumble bars are the kind of dessert that earns a permanent spot in your recipe rotation. They’re easy enough for beginners, delicious enough for experienced bakers, and versatile enough to serve at any occasion. Whether you’re bringing them to a potluck, packing them for a picnic, or simply enjoying them with your afternoon coffee, they deliver every single time.
The best part? Once you’ve made them a few times, you won’t even need to look at the recipe anymore. The process becomes second nature, and you’ll find yourself whipping up a batch whenever you have blueberries that need using up.
So grab your ingredients, preheat that oven, and get ready to fill your kitchen with the smell of sweet, buttery goodness. These bars are about to become your new favorite dessert.For more easy recipes perfect for any day of the week, explore quick and easy meals or browse through desserts and sweet treats for more inspiration.
Still wondering what to cook tomorrow? Take the stress out of dinner with my simple 7-day meal plan.
Get the 7-Day Meal Plan for $2.99