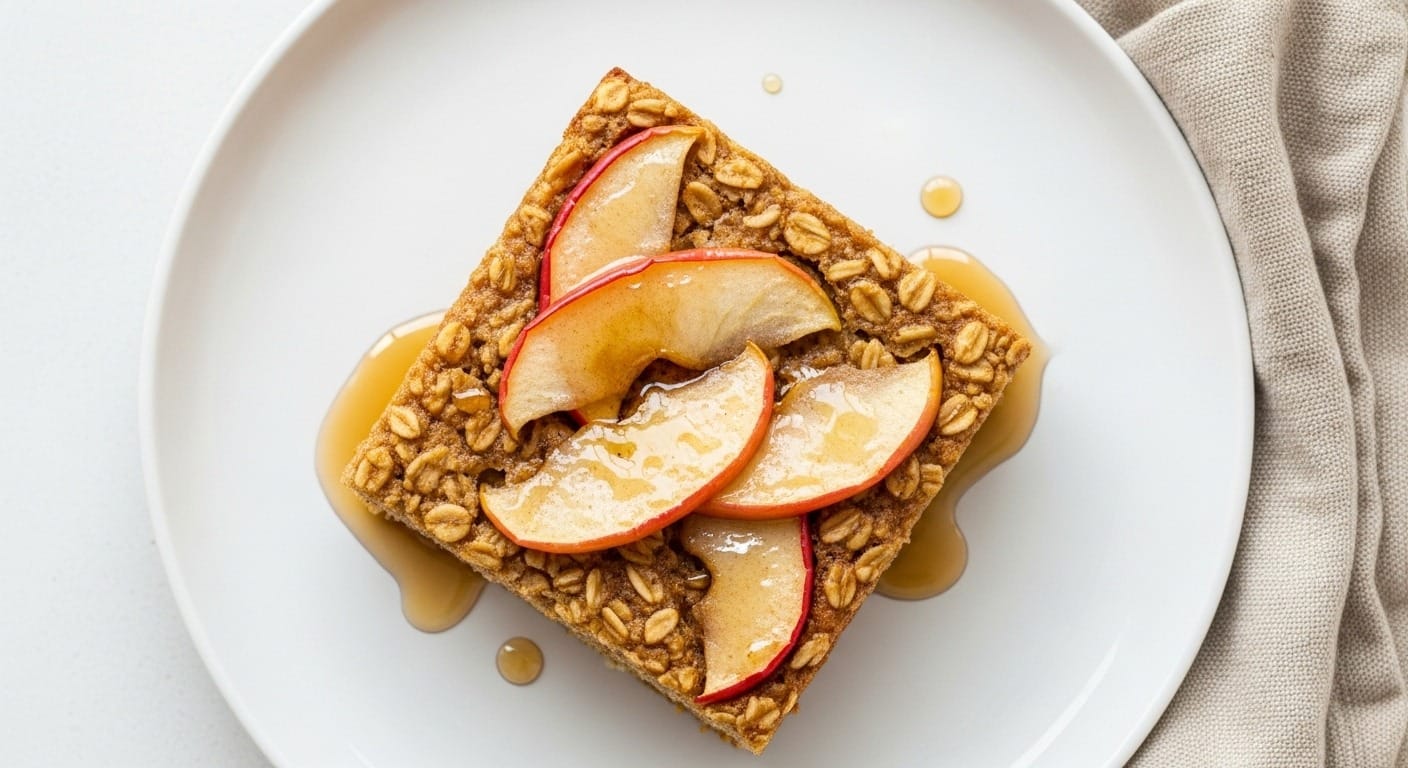
My mom used to say breakfast should feel like a warm hug, especially on cold mornings. This apple pie oatmeal bake does exactly that – it smells like cinnamon, tastes like your favorite pie, and comes together in about 40 minutes. The best part? You can bake it once and have breakfast ready for the entire week.
This recipe is beginner-friendly, requires one bowl for mixing, and delivers that cozy fall flavor without the hassle of making an actual pie. If you love sweet breakfasts that keep you full, this one’s a keeper.
Why You’ll Love This Apple Pie Oatmeal Bake
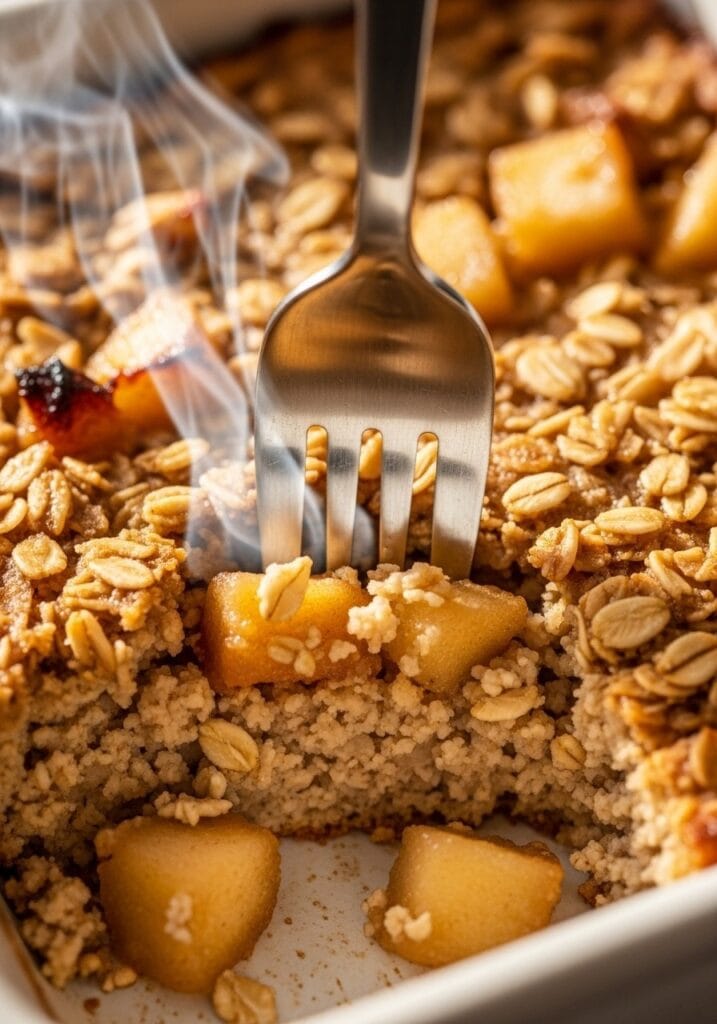
Think of this as the lovechild between a classic homemade apple pie and your favorite bowl of oatmeal. It’s baked, not stovetop, which means you can walk away while it cooks. The texture sits somewhere between cake and traditional oatmeal – firm enough to slice into squares, but soft enough to feel comforting.
Tired of Deciding What to Cook Every Night?
I’ve put together a simple 7-day dinner meal plan using my most-loved recipes — complete with a grocery list and flexible swaps.
Just $2.99 – Instant Download
Get the Meal Plan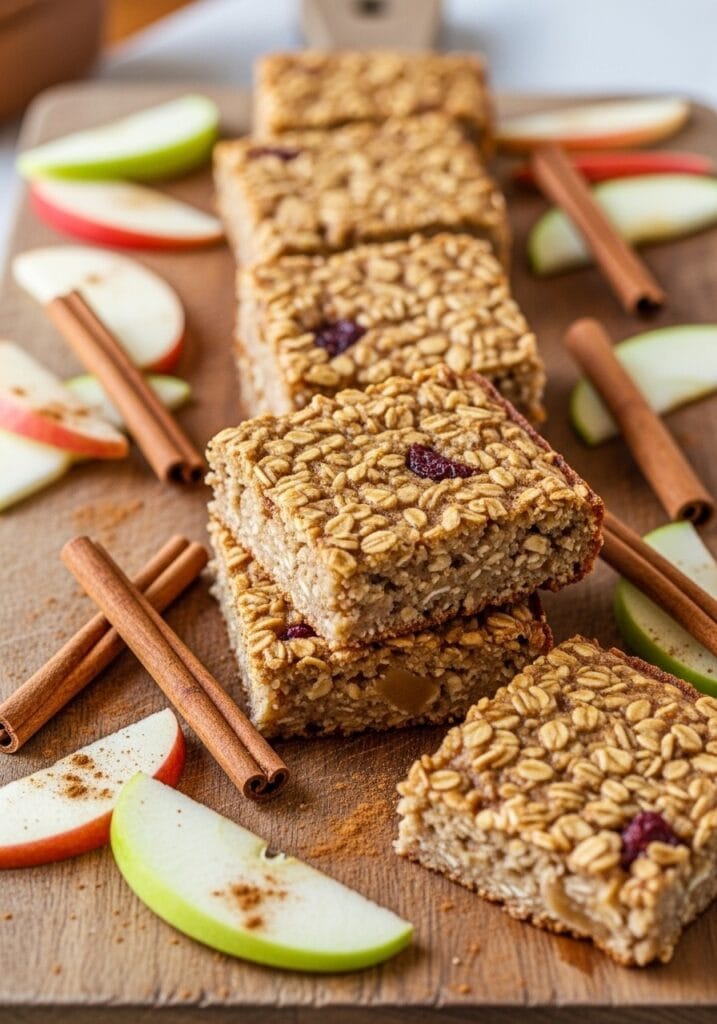
You get all the flavors of apple crumble pie without rolling out dough or worrying about soggy bottoms. The apples caramelize slightly as they bake, creating pockets of sweetness throughout. It also works beautifully for meal prep – just reheat individual portions throughout the week.
If you’re someone who gravitates toward quick easy meals but still wants something that tastes homemade, this fits perfectly.
What Makes This Different From Regular Oatmeal?
Regular stovetop oatmeal is creamy and porridge-like. This baked version has structure. You can pick it up with your hands if you want. The edges get slightly crispy while the center stays tender. It’s closer to an apple pie with crumb topping in terms of texture, but way easier to make.
The baking process also deepens the cinnamon flavor and lets the apples soften without turning mushy. You end up with distinct apple pieces rather than applesauce mixed into oats.
Some people compare it to baked oatmeal cups, but this version bakes in one pan and gets sliced after. Less fuss, same great result. If you’ve tried pumpkin spice cinnamon rolls, you know how baking amplifies spice flavors – same principle here.
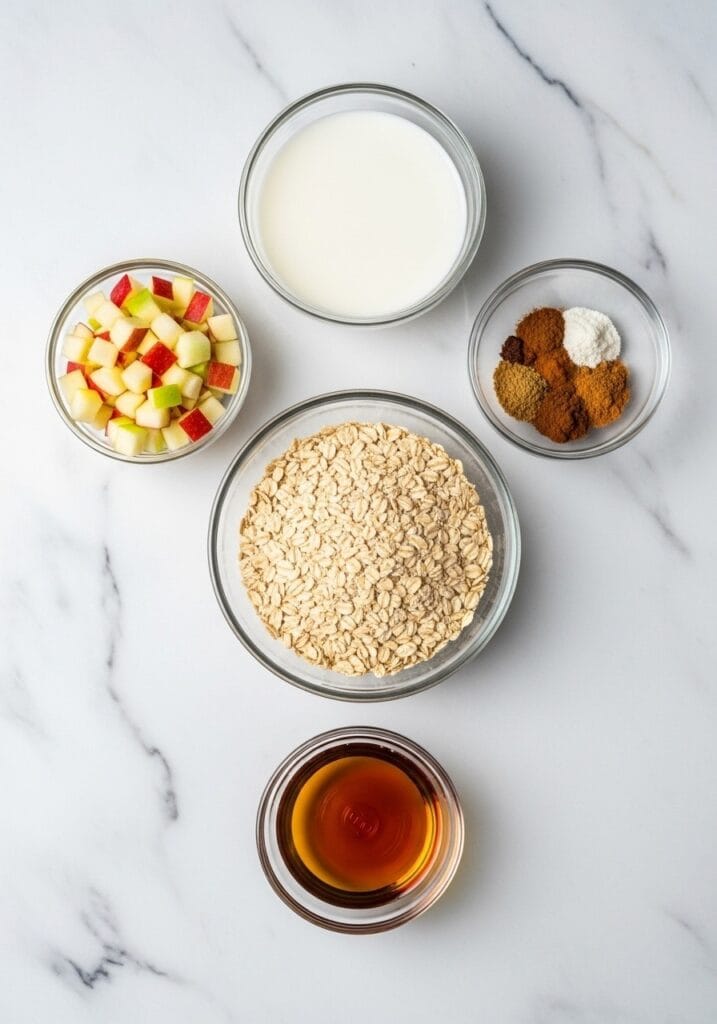
Ingredients You’ll Need
For the Oat Base:
- 2 cups (200g) rolled oats (not instant)
- 1 tsp baking powder
- 1.5 tsp ground cinnamon
- 1/4 tsp ground nutmeg
- 1/4 tsp salt
- 2 cups (480ml) milk (dairy or almond)
- 1/3 cup (80ml) maple syrup or honey
- 1 large egg
- 3 tbsp (45g) melted butter or coconut oil
- 1 tsp vanilla extract
For the Apple Layer:
- 2 medium apples (about 300g), peeled and diced into 1/2-inch cubes
- 1 tbsp lemon juice
- 2 tbsp brown sugar
- 1/2 tsp cinnamon
Optional Toppings:
- Chopped pecans or walnuts
- Extra maple syrup
- Greek yogurt
- A pinch of sea salt
Substitutes: Use flax eggs (1 tbsp flaxseed meal + 3 tbsp water) instead of regular eggs. Swap maple syrup with agave or date syrup. If you don’t have nutmeg, double the cinnamon.
Step-by-Step Instructions
Step 1: Prep Your Apples
Peel and dice the apples into small cubes. Toss them with lemon juice, brown sugar, and cinnamon in a bowl. Set aside while you prepare the oat mixture. The lemon keeps them from browning and adds a slight tang that balances sweetness.
Step 2: Mix the Wet Ingredients
In a large mixing bowl, whisk together milk, maple syrup, egg, melted butter, and vanilla extract. Make sure the butter isn’t too hot or it’ll cook the egg. Room temperature works best.
Step 3: Combine Dry Ingredients
In a separate bowl, stir together oats, baking powder, cinnamon, nutmeg, and salt. This ensures even spice distribution.
Step 4: Mix Everything Together
Pour the wet ingredients into the dry ingredients. Stir until just combined. Don’t overmix – it’s okay if it looks a bit lumpy. Fold in about two-thirds of the apple mixture, saving some for topping.
Step 5: Prepare the Baking Dish
Preheat your oven to 350°F (175°C). Grease an 8×8-inch baking dish with butter or line it with parchment paper. Pour the oat mixture into the dish and spread evenly.
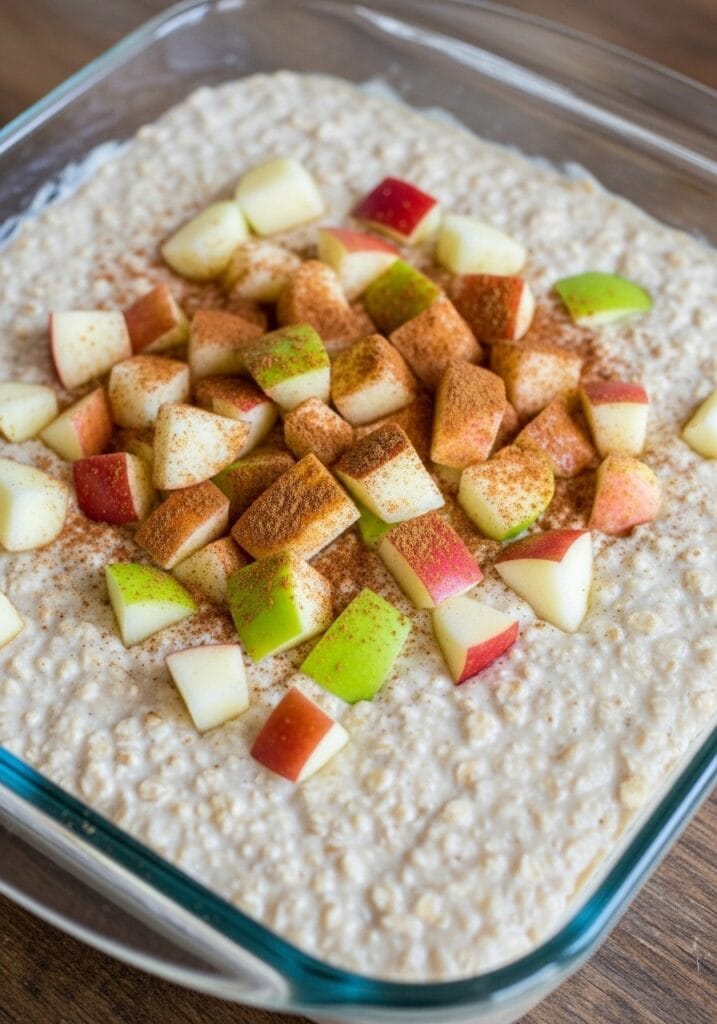
Step 6: Add the Remaining Apples
Scatter the reserved apple pieces on top of the oatmeal mixture. Press them down gently so they sink in slightly. Sprinkle with a tiny bit of extra cinnamon if you want.
Step 7: Bake
Place the dish in the oven and bake for 35-40 minutes. You’ll know it’s done when the edges turn golden brown and the center is set but still slightly soft. A toothpick inserted in the middle should come out mostly clean with just a few moist crumbs.
Step 8: Cool and Serve
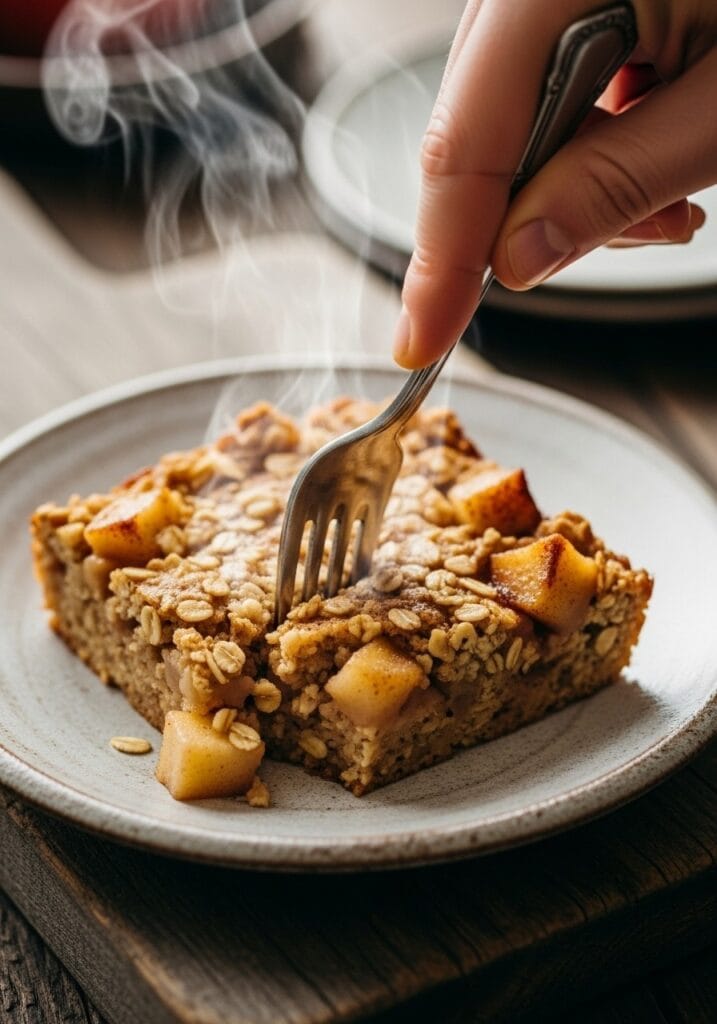
Let it cool for 10 minutes before slicing. This helps it firm up. Cut into 6-9 squares depending on how hungry you are. Serve warm with a drizzle of maple syrup or a dollop of yogurt.
Tips For the Best Results
Use the right oats. Rolled oats (old-fashioned oats) work best here. Instant oats will turn mushy, and steel-cut oats won’t soften enough in the baking time.
Don’t skip the lemon juice. It keeps the apples from oxidizing and adds brightness that prevents the dish from tasting too sweet.
Room temperature ingredients blend better. If your milk and egg are cold, the melted butter might solidify when mixed. Not a disaster, but slightly chunkier texture.
Adjust sweetness to taste. If your apples are very sweet, reduce the maple syrup slightly. Granny Smith apples add tartness, while Honeycrisp or Fuji bring more natural sugar.
Check doneness visually. Ovens vary. If the top browns too quickly but the center seems wet, tent with foil and bake 5 more minutes.
This reminds me a bit of the texture you get with gingerbread pancakes – that balance between cakey and soft.
Storage and Reheating
Store leftovers in an airtight container in the fridge for up to 5 days. Reheat individual squares in the microwave for 30-45 seconds or in a 300°F oven for 10 minutes.
You can also freeze portions. Wrap each square in plastic wrap, then place in a freezer bag. They’ll keep for 2 months. Thaw overnight in the fridge and reheat as usual.
Cold slices work too, honestly. Some people prefer them straight from the fridge with cold milk poured over, like you might eat no-bake strawberry cheesecake cups.
Serving Suggestions
This bake is filling on its own, but here are ways to dress it up:
For extra protein: Top with Greek yogurt or a spoonful of almond butter. Turns it into a more balanced meal if you’re using it post-workout.
For dessert vibes: Add a scoop of vanilla ice cream while it’s still warm. Seriously tastes like apple pie à la mode.
For crunch: Sprinkle chopped pecans or granola on top right before serving.
For kids: Drizzle with peanut butter or Nutella. My niece refuses to eat it any other way now.
If you’re into meal prep breakfasts, pair this with spinach feta egg muffins for a sweet-and-savory combo throughout the week.
Variations to Try
Berry Oatmeal Bake: Swap apples for mixed berries (fresh or frozen). Skip the cinnamon and add lemon zest instead.
Chocolate Chip Version: Stir in 1/2 cup chocolate chips after mixing the batter. Kids go crazy for this one.
Peanut Butter Banana: Use mashed banana instead of some of the milk, and swirl in 2 tbsp of peanut butter before baking.
Pumpkin Spice: Replace half the milk with pumpkin puree and use pumpkin pie spice instead of cinnamon/nutmeg.
Savory Option: Skip the sweetener and apples. Add shredded cheese, sautéed veggies, and herbs. Bake the same way. Works as a weeknight dinner side dish.
The formula is flexible once you understand the base ratio of oats to liquid.
Why This Works for Meal Prep
Unlike stovetop oatmeal that gets gummy in the fridge, baked oatmeal holds its texture. You can make it Sunday night and have breakfast sorted until Thursday. Each square stays distinct, doesn’t clump together, and reheats without drying out.
It’s also easy to customize each serving as you go. One day you might want yogurt on top, another day just maple syrup. The base stays neutral enough to work with different toppings.
If you’re already making 20-minute chicken rice bowls for lunch prep, this fits the same workflow. One cook session, multiple meals.
Common Mistakes to Avoid
Using instant oats. They’ll turn to mush. You want rolled oats that hold their shape.
Overmixing the batter. Stir just until combined. Overmixing develops gluten from the oats and makes it dense.
Cutting too soon. I know it’s tempting, but let it cool for 10 minutes. Otherwise it falls apart.
Skipping the baking powder. It’s what gives lift and prevents a dense brick. Don’t leave it out.
Not greasing the pan well. Even with parchment, a little butter or oil on the sides helps with clean removal.
I’ve made this at least twenty times and these are the mistakes I see most often when friends try the recipe.
Nutritional Information (Per Square)
Based on cutting into 9 squares:
- Calories: approximately 180
- Protein: 5g
- Carbs: 28g
- Fat: 6g
- Fiber: 3g
This is an estimate and varies based on toppings and exact ingredients used. The oats provide soluble fiber, which helps with digestion and keeps you full longer.
If you’re watching sugar, use unsweetened almond milk and reduce the maple syrup to 3 tablespoons. The apples provide natural sweetness too.
For a higher protein version, mix in a scoop of unflavored protein powder with the dry ingredients. Check out high-protein chicken salad if you’re focusing on protein throughout your meals.
Equipment You’ll Need

- 8×8-inch baking dish (glass or metal both work)
- Large mixing bowl
- Measuring cups and spoons
- Whisk or fork
- Knife and cutting board for apples
That’s it. No stand mixer, no food processor. If you have one-pot creamy chicken orzo in your cooking rotation, you already have everything needed.
How to Know When It’s Done
The edges will pull away slightly from the pan and turn golden. The center should look set, not jiggly, when you gently shake the pan. A toothpick test works too – it should come out with a few moist crumbs but no wet batter.
If the top browns too fast but the inside seems undercooked, cover with aluminum foil and continue baking. Every oven is different. Mine runs hot, so I usually check at 32 minutes instead of waiting the full 40.
Can You Make This Ahead?
Yes. You can prep the entire unbaked dish the night before, cover it tightly with plastic wrap, and refrigerate overnight. In the morning, let it sit at room temperature for 10 minutes while the oven preheats, then bake as directed. You might need an extra 5 minutes of baking time since it starts cold.
You can also freeze the baked oatmeal. Wrap cooled squares individually and freeze for up to 2 months. Reheat from frozen in the microwave for about 90 seconds.
This works really well if you’re trying to simplify mornings. Similar to how 20-minute pesto pasta with chicken comes together fast, having this ready means less decision fatigue.
Why Baked Oats Are Having a Moment
Baked oatmeal has been around forever, but it’s gotten popular lately because it photographs well and solves the “what’s for breakfast” problem. It also travels better than regular oatmeal – you can pack it in your bag without worrying about spills.
The texture appeals to people who find traditional oatmeal too mushy or porridge-like. And unlike overnight oats, which need to be made 8 hours ahead, this bakes in under an hour.
Plus, it feels like eating cake for breakfast without the guilt. When something tastes like dessert but has whole grains and fruit, that’s a win.
If you love desserts and sweet treats but want breakfast options that feel indulgent, this bridges that gap perfectly.
Final Thoughts
This apple pie oatmeal bake is one of those recipes that works for multiple occasions. Weekend brunch? Check. Weekday meal prep? Check. Potluck contribution? Absolutely. It’s also flexible enough to adapt based on what’s in your pantry.
The combination of tender cinnamon apples and hearty oats hits that comfort food spot without being heavy. And because it bakes rather than sitting on the stove, you can do other things while it cooks.
If you’re looking for more easy breakfast ideas that don’t require standing over the stove, give this one a try. It might just become your new Sunday routine.
Recipe Information:
- Prep Time: 10 minutes
- Cook Time: 40 minutes
- Total Time: 50 minutes
- Servings: 6-9 squares
- Difficulty Level: Beginner
- Equipment Needed: 8×8-inch baking dish, mixing bowls, whisk
Still wondering what to cook tomorrow? Take the stress out of dinner with my simple 7-day meal plan.
Get the 7-Day Meal Plan for $2.99