My grandmother used to say that the best recipes don’t need a long list of ingredients. She was right. These 3-ingredient peanut butter cookies prove that simplicity can be absolutely delicious. The first time I made them, I was skeptical – how could just three things create something so soft and flavorful? But one bite changed everything.

These cookies are naturally gluten-free, incredibly easy to make, and perfect for those moments when you need something sweet but don’t want to spend an hour in the kitchen. Whether you’re an experienced baker or someone who’s just starting out, this recipe will become your go-to. They take less than 20 minutes from start to finish, and the result is a batch of soft, chewy cookies that taste like they came from a fancy bakery.
Why These Peanut Butter Cookies Work
The magic of these easy peanut butter cookies lies in their simplicity. Unlike traditional cookie recipes that require flour, butter, baking soda, and vanilla extract, this recipe strips everything down to the essentials. The peanut butter acts as both the fat and the flavor base. The egg binds everything together and adds moisture. The sugar provides sweetness and helps create that perfect soft texture.
Tired of Deciding What to Cook Every Night?
I’ve put together a simple 7-day dinner meal plan using my most-loved recipes — complete with a grocery list and flexible swaps.
Just $2.99 – Instant Download
Get the Meal PlanWhat makes them even better? They’re naturally gluten-free. No special flour substitutes needed. No complicated techniques. Just three ingredients mixed together, shaped, and baked. It’s the kind of recipe that feels almost too easy to be real, but trust me, it works every single time.
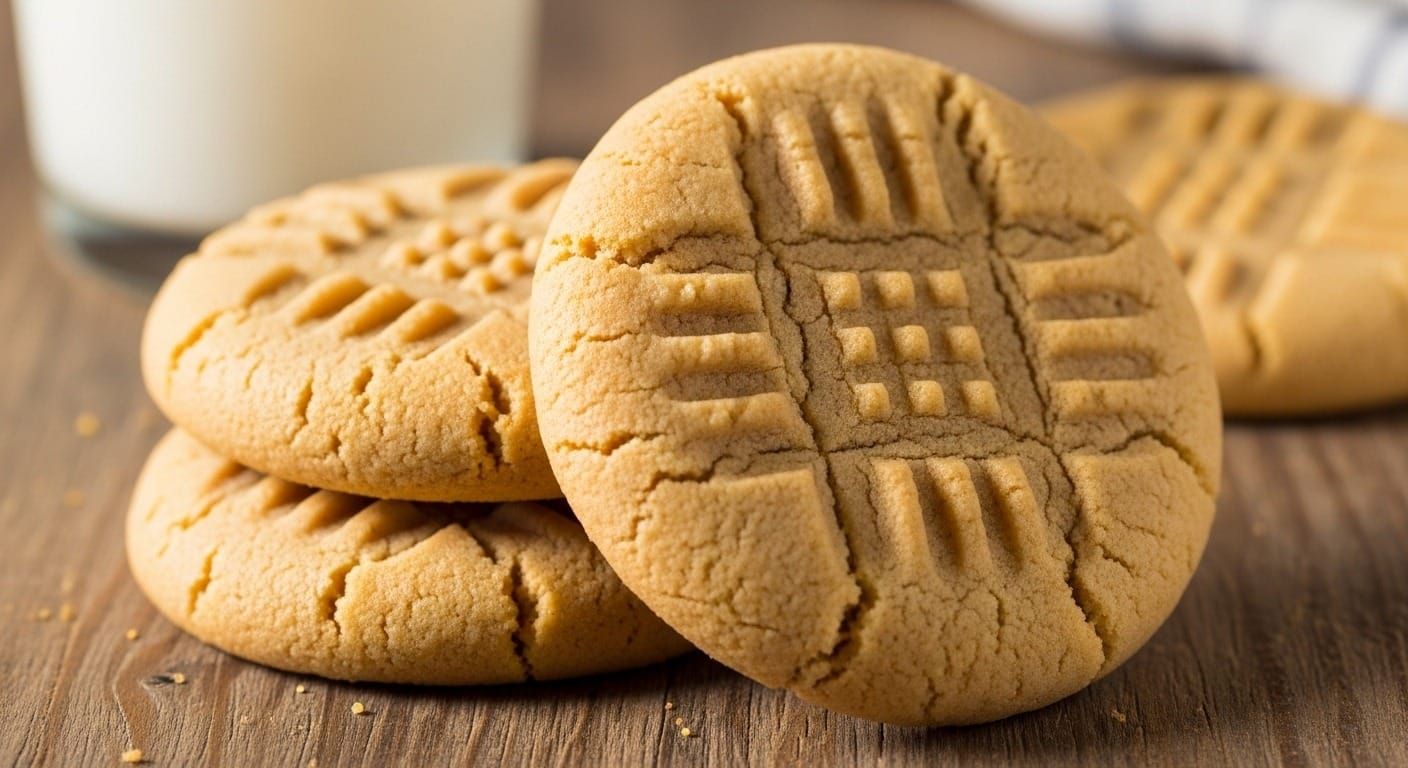
These cookies have a rich peanut butter taste that’s not too sweet. They’re soft in the center with slightly crisp edges. And that classic crosshatch pattern on top? It’s not just for looks – it actually helps the cookies bake evenly and adds a nice texture.
Ingredients You’ll Need

For the Cookie Dough:
- 1 cup (250g) creamy peanut butter (not natural or oil-separated)
- 1 cup (200g) granulated white sugar
- 1 large egg (room temperature)
Substitutions:
If you only have natural peanut butter, you can use it, but the cookies might spread more and have a slightly different texture. Make sure to stir the peanut butter well before measuring. For a less sweet version, reduce the sugar to ¾ cup, though the texture will be slightly different. If you’re avoiding eggs, a flax egg (1 tablespoon ground flaxseed mixed with 3 tablespoons water, left to sit for 5 minutes) can work, but the cookies won’t be quite as soft.
Step-by-Step Instructions
Step 1: Preheat your oven to 350°F (175°C). Line a large baking sheet with parchment paper or a silicone baking mat.
Step 2: In a medium mixing bowl, combine the peanut butter and sugar. Use a wooden spoon or spatula to mix them together until well combined. This should take about 1 minute. The mixture will look thick and slightly grainy.
Step 3: Crack the egg into the bowl. Mix everything together until you have a smooth, uniform dough. This should take another minute or so. The dough will be thick and slightly sticky.
Step 4: Scoop the dough using a tablespoon or cookie scoop (about 1 tablespoon of dough per cookie). Roll each scoop into a ball between your palms.
Step 5: Place the dough balls on the prepared baking sheet, spacing them about 2 inches apart. They will spread slightly as they bake.
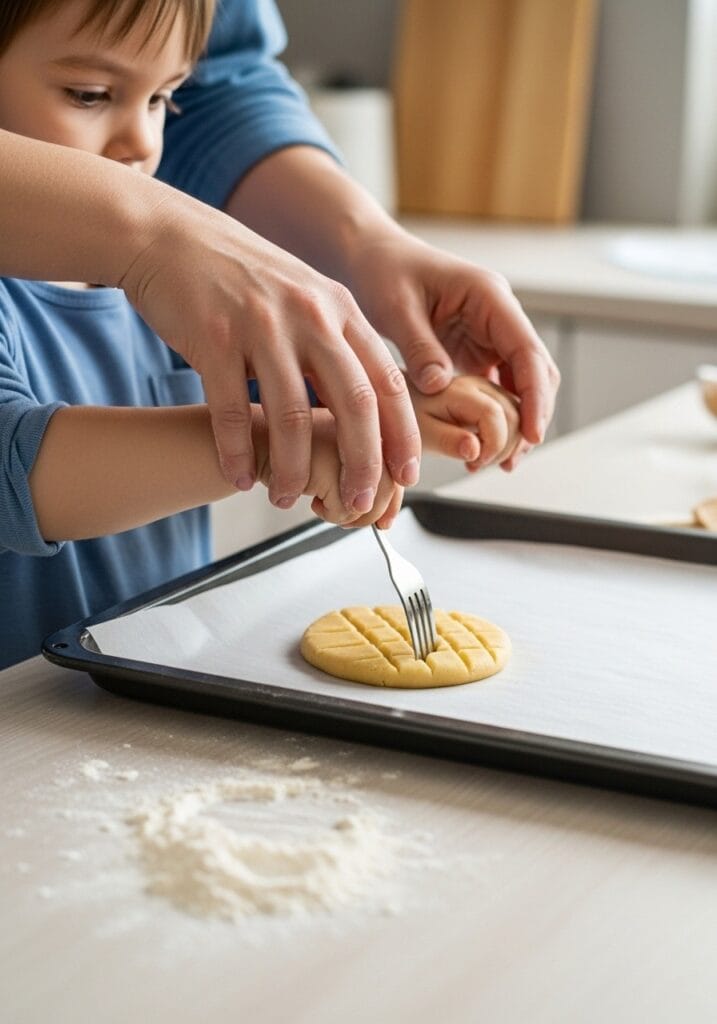
Step 6: Use a fork to press down on each cookie, creating a crisscross pattern. Dip the fork in sugar between presses to prevent sticking. Press gently but firmly – the cookies should flatten to about ½ inch thick.
Step 7: Bake for 10-12 minutes. The cookies are done when the edges are just set and lightly golden. The centers might look slightly underbaked, but they will firm up as they cool. Don’t overbake – this is the secret to keeping them soft.
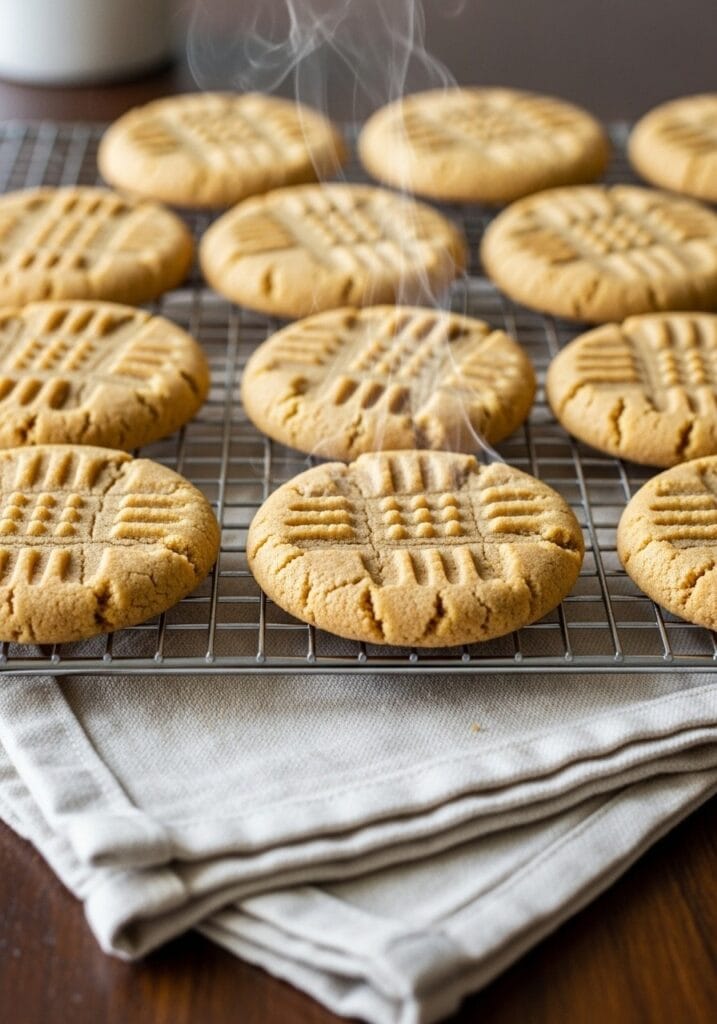
Step 8: Remove from the oven and let the cookies cool on the baking sheet for 5 minutes. They will be very soft and fragile when hot. After 5 minutes, transfer them to a wire rack to cool completely.
Recipe Information
Serving Size: Makes 18-20 cookies
Cooking Time:
- Prep time: 5 minutes
- Baking time: 10-12 minutes
- Total time: 17 minutes
Difficulty Level: Beginner-friendly
Equipment Needed:
- Mixing bowl
- Wooden spoon or spatula
- Baking sheet
- Parchment paper or silicone mat
- Fork
- Wire cooling rack
Tips for Perfect Cookies Every Time

The type of peanut butter you use really matters. Regular creamy peanut butter (like Jif or Skippy) works best because it has added oils and stabilizers that help the cookies hold their shape. Natural peanut butter, which separates and has only peanuts and salt, can make the cookies spread too much and become oily.
Room temperature eggs mix more easily into the dough. If you forget to take your egg out ahead of time, place it in a bowl of warm water for 5 minutes before using.
Don’t skip the fork pattern. Besides looking traditional and pretty, pressing the cookies down helps them bake evenly. Without flattening, the centers might stay raw while the edges burn.
Watch your baking time carefully. The difference between perfectly soft cookies and dry, crumbly ones is just a minute or two. Pull them out when they look slightly underdone in the center. They’ll continue cooking on the hot pan after you remove them from the oven.
For even softer cookies, slightly underbake them by 1-2 minutes. They’ll be more fragile when hot but incredibly tender once cooledImage Prompt: A hand holding a perfectly baked peanut butter cookie with a bite taken out, showing the soft, crumbly interior texture, with more cookies stacked on a white plate in the soft-focused background.
Variations to Try
Once you’ve mastered the basic peanut butter cookies recipe, it’s fun to experiment. Here are some variations that work beautifully:
Chocolate Chip Addition: Fold in ½ cup of mini chocolate chips to the dough before shaping. This creates something similar to peanut butter chocolate chip cookies but even simpler.
Peanut Butter Blossoms: Press a chocolate kiss into the center of each cookie immediately after they come out of the oven. This classic variation turns them into peanut butter blossom cookies that everyone loves.
Sea Salt Sprinkle: Add a tiny pinch of flaky sea salt on top of each cookie before baking. The sweet-salty combination is incredible.
Cinnamon Swirl: Add ½ teaspoon of ground cinnamon to the dough for a warm, spiced flavor that’s perfect for fall.
Chocolate Drizzle: Once cooled, drizzle melted chocolate over the tops of the cookies for an elegant finish.
Storage and Make-Ahead Tips
These cookies stay soft for days if stored properly. Place them in an airtight container at room temperature, and they’ll keep for up to 5 days. If you want them to last longer, refrigerate them for up to 2 weeks. Just know that refrigeration can make them slightly firmer, so let them come to room temperature before eating.
You can also freeze the baked cookies. Layer them between sheets of parchment paper in a freezer-safe container. They’ll keep for up to 3 months. Thaw at room temperature for about 30 minutes before serving.
Want to make the dough ahead? Roll the dough into balls, place them on a baking sheet, and freeze until solid (about 1 hour). Transfer the frozen dough balls to a freezer bag. When you’re ready to bake, place them on a baking sheet, press with a fork, and bake from frozen. Add 1-2 extra minutes to the baking time.
Common Questions
Why are my cookies too dry? Overbaking is usually the culprit. Remember, these cookies continue to firm up as they cool. Pull them out when they look slightly underbaked in the center.
Can I use crunchy peanut butter? Yes, but the texture will be different. The cookies will have little peanut pieces throughout, which some people love. The texture might be slightly less soft.
Why did my cookies spread too much? This can happen if you used natural peanut butter that’s too oily, if your oven runs hot, or if you didn’t press the cookies down before baking. Make sure your oven temperature is accurate.
Can I make these without sugar? Sugar is essential to the structure and texture of these cookies. You could try a 1:1 sugar substitute designed for baking, but I haven’t tested this personally.
Serving Suggestions
These cookies are perfect on their own, but they’re even better paired with the right accompaniments. Serve them with a cold glass of milk for the classic experience. The creamy milk cuts through the rich peanut butter flavor perfectly.
For dessert, try making ice cream sandwiches. Place a scoop of vanilla ice cream between two cookies and gently press together. Wrap in plastic wrap and freeze for at least 2 hours. It’s a quick and easy treat that feels special.
They’re also wonderful crumbled over vanilla yogurt for breakfast or as a topping for ice cream sundaes. The slightly salty, sweet flavor adds great texture and taste to simple desserts.
For parties, these cookies are ideal because they’re easy to transport and everyone loves them. Pack them in a tin or cookie box, and they’ll survive the journey perfectly.
Why This Recipe Matters
In a world of complicated recipes with endless ingredients, these 3-ingredient peanut butter cookies are refreshing. They prove that you don’t need a pantry full of specialty items to make something delicious. You probably have everything you need right now.
They’re also incredibly forgiving. Unlike finicky cookies that require precise measurements and techniques, these are nearly impossible to mess up. The dough comes together in minutes, there’s no chilling required, and you don’t need any special equipment.
For busy families, these cookies are a lifesaver. When your kids want to help in the kitchen, this is the perfect recipe. The steps are simple enough for young bakers, and there’s minimal cleanup. It’s a great way to introduce children to baking without overwhelming them.
These cookies also work beautifully for anyone following a gluten-free diet. No need to buy expensive gluten-free flour blends or worry about cross-contamination. Peanut butter naturally doesn’t contain gluten, making these cookies safe and delicious for people with celiac disease or gluten sensitivity.
The Science Behind the Simplicity
You might wonder how these cookies can work without flour. The answer lies in the protein content of peanut butter. Peanuts are naturally high in protein, and when combined with egg (another protein source) and heated, the proteins denature and create structure. The sugar adds bulk and sweetness while also contributing to the texture through caramelization.
The egg acts as the binder, holding everything together. As it bakes, the egg proteins set and create the characteristic cookie texture. The small amount of moisture in the egg also creates steam, which helps the cookies rise slightly and stay tender.
The sugar does more than sweeten. It helps create the soft, tender crumb by interfering with protein bonding. It also browns during baking, creating those lovely golden edges and adding depth of flavor through caramelization.
Making These Cookies Your Own
Once you’re comfortable with the basic recipe, feel free to experiment. Some bakers like to add a pinch of salt to enhance the peanut butter flavor. Others prefer brown sugar instead of white for a deeper, more caramel-like sweetness.
You could also try different nut butters. Almond butter, cashew butter, or even sunflower seed butter (for nut-free options) work with this same formula. Each will give you slightly different flavors and textures, but the basic concept remains the same.
For holidays, press colored sugar or sprinkles onto the cookies before baking. During Christmas, red and green sprinkles make them festive. For Valentine’s Day, try pink and red. It’s an easy way to make these simple cookies feel special for any occasion.
Final Thoughts
These 3-ingredient peanut butter cookies have earned their place as a staple recipe. They’re proof that sometimes the simplest approach is the best one. No complicated techniques, no hard-to-find ingredients, no hours of work. Just three everyday items transformed into something truly delicious.
The next time you’re craving something sweet, skip the store-bought cookies and whip up a batch of these instead. In the time it would take you to drive to the store and back, you could have warm, homemade cookies cooling on your counter. And unlike other desserts that require multiple steps or special ingredients, these cookies are almost effortless.
They remind me that cooking doesn’t always have to be complicated to be good. Sometimes the most memorable recipes are the ones that strip away all the extras and focus on pure, simple flavor. These cookies do exactly that, and they do it perfectly.
Still wondering what to cook tomorrow? Take the stress out of dinner with my simple 7-day meal plan.
Get the 7-Day Meal Plan for $2.99